
Shooting Tip 1: Position Shooting
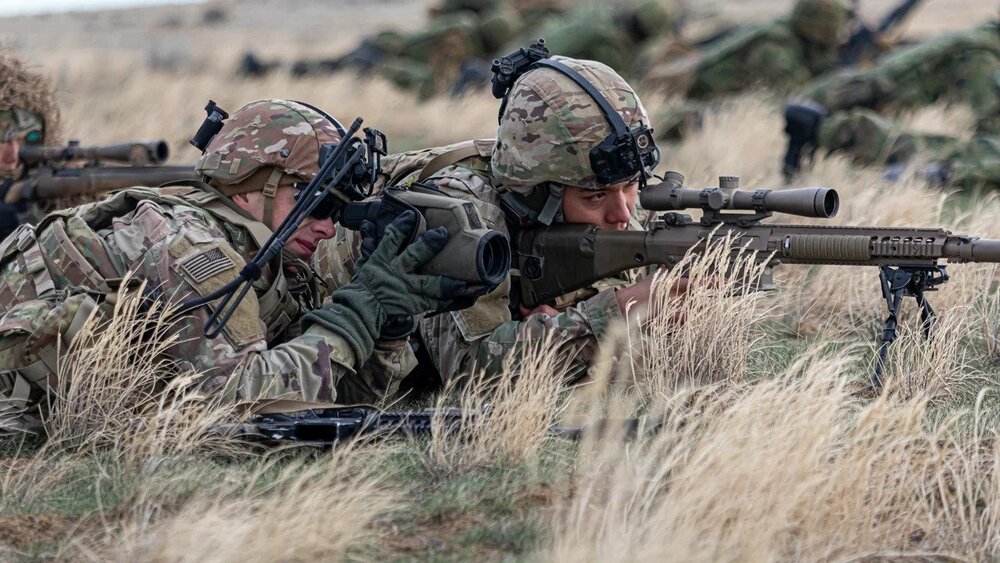
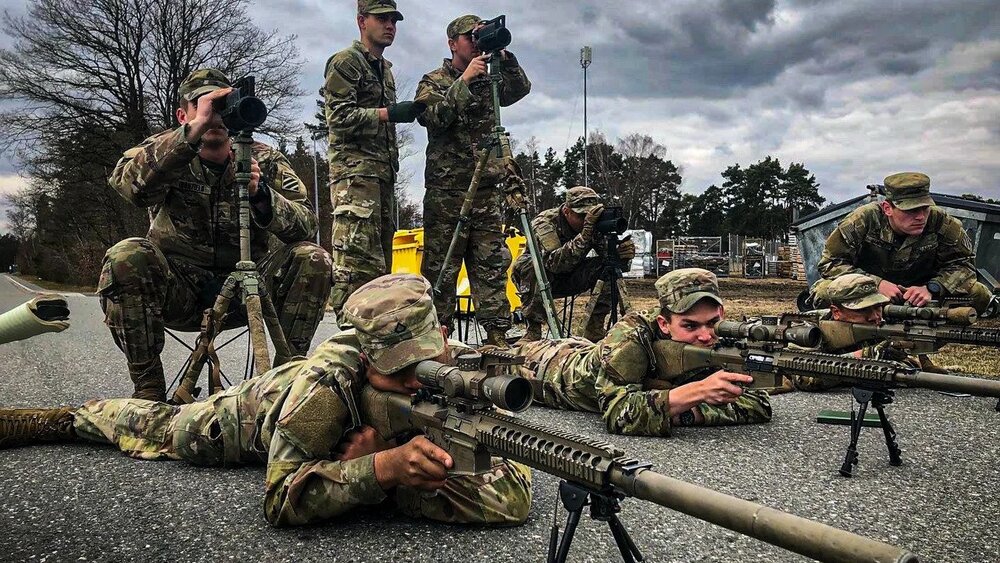
The core of any sniper training mirrors a conventional shooting course, which is establishing the basics of position rifle shooting in a field environment. The very first formal sniping courses were literally written and developed by competition shooters. The first step in any sniping program is to relearn (or learn for the first time) the basics of effective position shooting. A poor hold, inconsistent position, lackluster trigger control, and flinching are all common maladies found in most military-trained shooters, to say nothing of the general gun-owning public. Yep, the boring ol’ basics. No benches, sticks, or rests of any kind. Just learn to hold the rifle and get bullets to hit the same place.
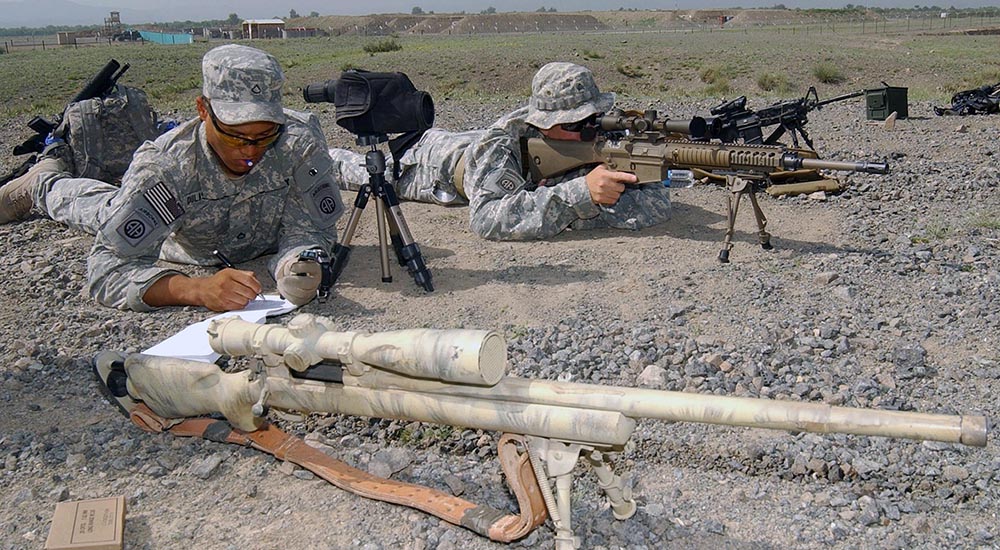
A critical component is offering near-perfect feedback to allow the shooter to see the exact placement of every shot fired. A Known Distance range allows marking the location of groups and individually fired rounds at full distance. Zero settings and marksmanship errors are readily observable and more easily diagnosed.
You don’t necessarily need a full distance range at this stage. You can do this initial work on a 25-meter range with scaled targets. Shooting at under 100 yards or so allows the use of a spotting scope to track impacts without needing someone to pull targets. The point is to learn and/or review fundamental marksmanship skills because everyone, no matter how good, will benefit from a refresher.
Initial zeroing and ranging exercises can be conducted at short range, too. At twenty-five meters, paper targets with appropriately sized silhouettes and offsets simulate shots all the way to 800 meters. If the shooter has a good zero and uses the reticle appropriate for the simulated distance, then the shots will go into the indicated offset point. The same idea is used at 300 meters, but steel gongs for impacts are offset from the cardboard aim point. All of the fundamentals apply here. Three MOA at 500 is fifteen inches, still inside the vitals of many big game animals. Recording data of previous engagements forces the shooter to pay better attention to the feedback received and, hopefully, learn from it. Now let’s make it work at full distance.
Shooting Tip 2: Maintaining Zero
The term “zero” implies no deviation from the point of aim to the point of impact. Because the line of sight is straight and trajectory is not, zero is used in reference to a number of different things:
Mechanical Zero: Physically centering the sights within their range of movement.
No Wind Zero: Windage setting for a given lot of ammo disregarding environment.
Elevation Zero: Elevation setting for a specific distance with a given lot of ammo and environment.
Point Blank (“Battlesight”) Zero: Point-blank range is the distance over which the trajectory of your launched bullet remains within the intended impact area, such as the vitals, when aiming directly center. This will vary by external ballistics and the size of the intended target. A flatter trajectory and/or larger target yields a longer point-blank range. A Point Blank Range Zero, often called a Battlesight Zero in the military, is a zero with an elevation and No Wind setting that allows the shooter to ignore the distance to a target of a certain size just beyond the distance zeroed for.
True Zero: Specific sight setting for a specific shot in a specific environment.
Finding Mechanical Zero just centers the sights. Turn the sight all the way to one side and count the total number of clicks going the other way. Divide by two and click back that many to return to dead center. Mark the adjustment knob to make it easy to quickly return to this known point. This setting doesn’t have any direct relation to an actual zero (where your bullets are going) but provides a known point that is easy to start from.
Once you’ve found the mechanical zero, establish a No Wind zero. That’s the windage setting needed to center the cone of fire with your given lot of ammunition when no wind is blowing. This can initially be established at 25 meters but needs to be confirmed at a distance. If you misread your group center by 1/4-inch at 25 meters it yields a full minute of windage error. 100 meters is a better distance to start as that same 0.25-inch error puts you off by a quarter MOA, smaller than many iron sights can even adjust to.
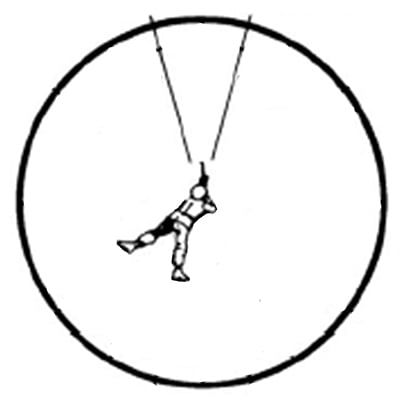
Imagine the shooter’s position in the center of a large circle with the target on the circle’s edge. The range or distance to the target is the radius of that circle. Shooting is measured in angles and the amount covered depends on the target’s distance.
Note how many clicks from the center (mechanical zero) you moved your sights to center your group and record the direction and distance. For example, from a satisfactory wind zero, you move the sight left six clicks to return to mechanical zero. Some optical sights allow the turret or knob to be slipped so it can read zeroed when at No Wind. If you’re ever uncertain about your No Wind zero or have reason to believe the knob/turret slipped, return to mechanical zero, click back to the predetermined number of clicks, and you’ve returned to your No Wind zero.
Differences in environment (temperature, air resistance, altitude), ammunition lots and other factors can yield a zero change. Don’t marry your zero! That’s why you base the setting off of mechanical instead of directly marking the zero setting.
Shooting Tip 3: Finding Elevation Zero (Come-Ups)
Training on scaled targets at short range is effective because fundamentals practiced there carry over everywhere. However, learning to shoot at a full distance is a must for everyone wanting to become an effective sniper (or long-distance shooter). Instead of relying on the wind, you can get the setting for distance correct. To do so, we need to understand basic ballistics.
A bullet exits the muzzle traveling straight along the path of the bore. When the bullet makes the last contact with the barrel, it transitions to external ballistics and is in free flight. The bullet immediately begins decelerating due to drag (air resistance) and falling due to gravity. The longer the bullet is in flight the more it slows down and the faster it drops.
A launched bullet does not rise as it exits the muzzle. Instead, it falls due to gravity at the same rate as if it were dropped from your hand. A standard velocity, non-Magnum centerfire rifle bullet exits the muzzle at close to three times the speed of sound (2,800 to 3,100 feet per second, give or take), slams into the atmosphere, and slows. If you’ve ever stuck your hand out a car window at 10 miles per hour and at 60 you have a sense of what air drag does as speed increases. Note that 2,800 feet per second is over 1,909 mph.
Because of this falling and slowing, the barrel is angled up to compensate. With our face on the stock, the sight or optic is above this angled-upward line of the bullet. The line of sight aligned on the target is straight whereas the barrel below is angled up. The bullet flies straight from the barrel, which is angled at an upward path towards our line of sight. At some point, the bullet’s path (trajectory) will intersect the line of sight and continue up until gravity and air resistance slow it enough that the bullet begins going downward. Eventually, this downward path will re-intersect our line of sight and continue descending at a faster pace. The bullet begins to slow down even more until it hits something or meets Mother Earth.
If using an optic with a BDC (Bullet Drop Compensator) reticle, zero the main reticle at the distance specified by the manufacturer (usually 100 yards or meters) and elevation come-ups are then made by using the prescribed aiming mark in the reticle. Of course, this only works precisely if you are using ammunition with a trajectory intended by the manufacturer. Sadly, many sights give a generic aiming mark, usually for every 100 yards/meters of distance, without any specific information as to how much elevation holdover is built into each aiming point. If that’s the case with your sight, use an MOA chart (“barber pole”) at a measured distance to determine how many minutes and/or mils of hold over each aim point actually yields.
Shooting Tip 4: Range Estimation
The ability to find elevation zero depends on knowing the distance. With a Battlesight Zero the front sight width is a crude but accurate enough estimate. Any silhouette that appears the same size or bigger than the front sight is in range. Optics like the Trijicon ACOG enhance this by providing a series of aiming marks in 100 meter increments on the reticle with the horizontal stadia lines the same apparent width of a silhouette at the representative distance. Commercial optics with a BDC intended for hunting sometimes offer the same idea for big game animals. The stadia that best fits the target is also the best aiming mark, providing range estimation and elevation zero in one step without clicking.
Shooting Tip 5: Correcting for Wind
Ranging error or failing to put the correct elevation zero on can certainly lead to a miss. And still, these causes are less variable than wind. Wind conditions change constantly and “it ain’t never not worth nothin’.”
On the range, we suggest you use all available indicators to recognize how the wind is acting throughout the session. A sniper probably won’t have an anemometer or wind flags in the field but can learn these from a piece of training environment. Learn to call the wind the way you learn to call your shot. Face the target, call the direction and wind speed, and measure with a wind meter to see how close you were.
To make things easier, use a constant of 10 for all distances. With a full value ten miles per hour wind this yields one MOA correction for every 100 yards/meters of distance. For example, at 400 yards a full value of ten mph wind is four minutes, five mph is two MOA, 15 mph is six MOA and 20 mph is eight. The same wind at 200 yards is two MOA at ten mph, one MOA at 5 mph, three MOA at 15 and four MOA at 20. Divide these in half if the wind is quartering.
Anyone armed with a basic rifle and possessing a bit of knowledge and discipline can learn the skills of a sniper. Lacking a formal course, work to improve basic fundamentals along with zeroing and group shooting from the position. Combine this with a knowledge of ballistics and environment factors and you’re well on your way to learning the skills of the sniper.
FAQs
What are some common mistakes that impact shooting accuracy?
Common mistakes include poor hold, inconsistent positioning, lackluster trigger control, and flinching. The article provides advice on how to identify and rectify these and other issues.
How do I find zero with a scope?
To find zero with a scope, you need to align the reticle (the crosshairs or aiming point in your field of view) so that your point of aim matches your point of impact. This is typically done at a specific distance that you choose, often 100 yards. Start by setting up on a firm rest such as shooting bags or a bench, not attempting this off-hand or unsupported. Visually bore sight your scope if possible and adjust the turret so that the “0” aligns with the indicator mark on your scope. Remember, the magnification level on your scope does not influence this process, so use whatever level you’re most comfortable with.
How do I adjust for wind while shooting?
Adjusting for wind while shooting involves understanding how wind affects the trajectory of your bullet and making appropriate changes to your aim or scope settings. You need to estimate wind speed and direction, determine wind value and use a ballistics calculator to adjust your aim or scope.


Leave a Reply